
I hope this tutorial helps the readers who are starting out on bread making or those who have tried but failed. All the ingredients are commonly found in Australian supermarkets, bulk food stores and health food stores.
Baking bread makes sense economically, even if you make your bread in a bread maker, it will be much cheaper than buying premade bread. It will also be healthier as your homemade bread will contain only those ingredients you include, not flavour enhancers, preservatives or colourings.
You will see I've added gluten flour to this recipe. It will help those of you who have not yet got the kneading under control to still get an excellent loaf. When you're more proficient, you can leave it out.
I am happy to help anyone who is having trouble baking reasonable bread. Most problems are easy to fix. Just leave a note in the comments section and I'll get back to you as soon as I can.
THE RECIPE
1½ teaspoons dried yeast
1 tablespoon sugar
65 mls warm water
3¾ cups baker's flour - also called strong flour or high protein flour
3 teaspoons gluten flour
1 tablespoon butter/margarine (softened)
1½ teaspoons salt
1 tablespoon milk powder
250 mls warm water + more if necessary
Just a word about flour. Bread mix, which is commonly used in bread machines, is flour with bread improver and flavour enhancers added. We are NOT using bread mix. By adding the ingredients we add, we're adding natural flavour to the bread as well as giving it a lift, that as an inexperienced baker, you won't get without the gluten flour. When you start experimenting with other recipes you can leave out some of these ingredients and try others. Another thing you need to know about flour is that it's different all over the country. When baking with the various flours, they take different amounts of water. A flour in Melbourne will be slightly different to a flour in Brisbane because of the amount of humidity in the air. And even if you use the same bag of flour at different times of the year, you'll probably use slightly more or less water, according to the weather conditions. This is not a problem, it just means you have to know what your dough should look and feel like before going to the next step. Bread making is very tactile, even when making the dough in a bread machine, I feel it to make sure I have enough moisture in the dough. This recipe generally uses 315mls of water, but when I made this loaf yesterday I used about 40mls more. Sometimes the difference will be one spoon full, sometimes it will be almost a cup.
STEP 1
Activate the yeast. (Proofing)
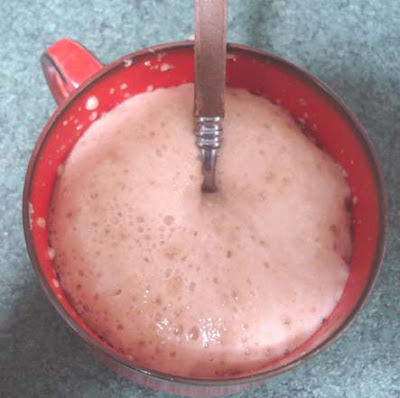
You don't want to go to the trouble of making the bread and find at the end it hasn't worked. One of the ways to be confident the bread will turn out well is to make sure the yeast you're about to use is alive. Yeast needs water and sugar to activate. If it's alive, when you add the water and sugar, the yeast will start fermenting and becoming frothy. This is what you want to see. Take 1½ teaspoons dried yeast, 1 tablespoon sugar and 65 mls warm water and mix together in a cup. Leave it aside for a few minutes while you prepare your other ingredients. When you come back to it 5 - 10 minutes later, it should look like this.
 STEP 2
Mixing the dough
Then add your dry ingredients to a large mixing bowl. Add the flour first, then make a little depression in the flour to contain your other dry ingredients. When all the dry ingredients are in, add your proofed yeast and the rest of the warm water. Mix all the ingredients together with a spoon until it gets to the point where your hands will mix it better, then start bringing the mixture together with your hands. This is the first point when you check the moisture content. If you need more water, your dough will look like this after you've added all the water stated in the recipe.You can see in the photo that the dough looks dry. It hasn't come together properly and there is still flour to be incorporated into the mix. Take notice what your dough feels like.
 You're aiming for a ball of dough that's combined all the ingredients, with a slightly moist feel. You don't want it wet and not dry either. If your dough looks like the above photo, add more water by doing this: get a half a cup of warm water and a dessertspoon. Add the water to the dough one spoon full at a time. You have to be careful not to add to much so do it bit by bit. When your dough looks like the following photo, you're ready to go to the next step.
 STEP 3
Kneading the dough
If you've had problems with handmade bread before, you're probably not kneading the dough long enough. This is a very important step if you want light bread with a good crumb. If you're good at kneading, this step will take you at least 8 minutes. If you're light handed, you'll take at least 10 minutes on this step.You need a firm and stable surface on which to knead your dough. It's best done on a clean bench top. Wipe the surface of your bench top with a clean cloth and warm soapy water. Don't use antiseptic wipes, you could kill the yeast. When you're satisfied the bench is clean, wipe it with a clean tea towel. This surface is ideal for kneading. If your bench top is not suitable, use a large bread board with a slightly wet tea towel folded in half under the board. The moistened tea towel will stop the board moving while you're kneading. Sprinkle a small amount of the same flour you used in the recipe onto your bench top and place the dough on it. Before you start kneading, poke your finger into the dough and see how the indent stays in there. This is a good way to test your dough as you go through the kneading process.
 Start kneading the dough. You can use both hands to do this. In the photos, I'm using one hand because I'm taking the photo with the other one. What you're trying to do is develop the gluten by working the dough and getting the gluten strands to develop. You do this using the heal of your hand. Push the top of the dough away from you with the heal of your hand while holding the dough steady with your other hand.

The dough stays right in front of you all the time, but you push a portion of it away with every action. After you've pushed out, fold that portion of the dough back on itself like the top of an envelope. Turn the dough a quarter turn and push it out again with the heal of your hand. Fold it back on itself. Another quarter turn. When you've kneaded for one minute, your dough will look like this:
 We can see here how the dough had been folded back on itself and that it's starting to look drier and smoother. Keep kneading for another few minutes and the dough is smoother again. If you poke your finger into it now, the dough will spring back out, not stay indented. Keep kneading until your dough is smooth and elastic, like this.
 You can see that the dough is smooth and elastic and if you poke your finger in it will spring out nicely. If you've been kneading for AT LEAST 8 minutes and your dough is smooth and looking like the photo above, then you're ready to go to move on.
Don't rush things though just for the sake of a few minutes because the work you do here makes or breaks your bread. Fold all the bread into itself so the other side forms a nice smooth ball like this:
 STEP 4
First rise
Place the ball of dough, smooth side up, in a clean bowl that's been very lightly greased with olive oil. Cover the dough with a clean moist tea towel or a lightly greased piece of plastic wrap. The bread must be covered well so it doesn't start to harden while it's rising. If you've got a cold kitchen the greased plastic wrap might be the better option. You want the dough to rise in a warm draft-free area. If the dough stays cold, it will take hours to rise. So place in in an oven that you've heated to about 150C for a few minutes and turned off. Or you could put it outside in the sun (I do this). Make sure it's covered properly though, you don't want flies or ants in your mix. Or place a heated wheat bag near the bowl. If you have a pot of soup on the stove that is still warm, place the bowl near the stove. If you have a hot water system that is warm during the day, that might be a good place for you. You're looking for a a temperature of around 20 - 24 C. If the area is too hot or too cold it will effect the taste and texture of the finished loaf. Leave the covered dough in the warm spot untouched for about 30 minutes and check. It needs to double in size, like this:
 When you dough looks like this, you're ready to go to the next step.
STEP 5
Punching down and forming the dough
Punch the dough to deflate it. It will look like this:
 Scoop the dough up out of the bowl, sprinkle flour on your bench top again and place the dough on the flour.Turn your oven on to its highest setting. Start kneading the dough again. Use the same technique as before with the heal of your hand and knead for two minutes:
 After two minutes of kneading, flatten the dough and roll it into a cigar shape.When it looks like this, you're ready to add some seeds:
 On my loaf I used a mixture of sesame and poppy seeds with oats. This stage is the opportunity to add more nutrition to the loaf with oats, wheatgerm, sesame or poppy seeds, soaked linseed or any other topping you want to use.
 Pick the loaf up with the smooth side on top and with your other hand, moisten the loaf all over with water. Roll the loaf in the seeds/oats so that's it's completely covered. The water will stick the coating to the loaf. If you don't want seeds on the loaf but would like a crusty loaf, moisten the dough with the water but don't add the seeds. If you want a softer loaf, don't add the water at this stage but put the loaf straight into a lightly greased loaf tin and sprinkle with a small amount of flour. If you like, you can make a slashes in the top of the loaf.
STEP 6
Second rise
Let the loaf sit in the loaf tin for the second rise until it's lifted a couple of inches but not bulging over the sides.
 STEP 7
Baking
You need a hot oven to get a good lift, so when the oven is hot, place the loaf in to cook. After 10 minutes, turn the oven down to 200C and cook for another 15 - 20 minutes, or until you can smell baked bread and the bread is golden brown. Put the bread on a cake rack and get the butter ready because you are about to enjoy your bread.

Baking bread makes sense economically, even if you make your bread in a bread maker, it will be much cheaper than buying premade bread. It will also be healthier as your homemade bread will contain only those ingredients you include, not flavour enhancers, preservatives or colourings.
You will see I've added gluten flour to this recipe. It will help those of you who have not yet got the kneading under control to still get an excellent loaf. When you're more proficient, you can leave it out.
I am happy to help anyone who is having trouble baking reasonable bread. Most problems are easy to fix. Just leave a note in the comments section and I'll get back to you as soon as I can.
THE RECIPE
1½ teaspoons dried yeast
1 tablespoon sugar
65 mls warm water
3¾ cups baker's flour - also called strong flour or high protein flour
3 teaspoons gluten flour
1 tablespoon butter/margarine (softened)
1½ teaspoons salt
1 tablespoon milk powder
250 mls warm water + more if necessary
Just a word about flour. Bread mix, which is commonly used in bread machines, is flour with bread improver and flavour enhancers added. We are NOT using bread mix. By adding the ingredients we add, we're adding natural flavour to the bread as well as giving it a lift, that as an inexperienced baker, you won't get without the gluten flour. When you start experimenting with other recipes you can leave out some of these ingredients and try others. Another thing you need to know about flour is that it's different all over the country. When baking with the various flours, they take different amounts of water. A flour in Melbourne will be slightly different to a flour in Brisbane because of the amount of humidity in the air. And even if you use the same bag of flour at different times of the year, you'll probably use slightly more or less water, according to the weather conditions. This is not a problem, it just means you have to know what your dough should look and feel like before going to the next step. Bread making is very tactile, even when making the dough in a bread machine, I feel it to make sure I have enough moisture in the dough. This recipe generally uses 315mls of water, but when I made this loaf yesterday I used about 40mls more. Sometimes the difference will be one spoon full, sometimes it will be almost a cup.
STEP 1
Activate the yeast. (Proofing)
You don't want to go to the trouble of making the bread and find at the end it hasn't worked. One of the ways to be confident the bread will turn out well is to make sure the yeast you're about to use is alive. Yeast needs water and sugar to activate. If it's alive, when you add the water and sugar, the yeast will start fermenting and becoming frothy. This is what you want to see. Take 1½ teaspoons dried yeast, 1 tablespoon sugar and 65 mls warm water and mix together in a cup. Leave it aside for a few minutes while you prepare your other ingredients. When you come back to it 5 - 10 minutes later, it should look like this.

Mixing the dough
Then add your dry ingredients to a large mixing bowl. Add the flour first, then make a little depression in the flour to contain your other dry ingredients. When all the dry ingredients are in, add your proofed yeast and the rest of the warm water. Mix all the ingredients together with a spoon until it gets to the point where your hands will mix it better, then start bringing the mixture together with your hands. This is the first point when you check the moisture content. If you need more water, your dough will look like this after you've added all the water stated in the recipe.You can see in the photo that the dough looks dry. It hasn't come together properly and there is still flour to be incorporated into the mix. Take notice what your dough feels like.


Kneading the dough
If you've had problems with handmade bread before, you're probably not kneading the dough long enough. This is a very important step if you want light bread with a good crumb. If you're good at kneading, this step will take you at least 8 minutes. If you're light handed, you'll take at least 10 minutes on this step.You need a firm and stable surface on which to knead your dough. It's best done on a clean bench top. Wipe the surface of your bench top with a clean cloth and warm soapy water. Don't use antiseptic wipes, you could kill the yeast. When you're satisfied the bench is clean, wipe it with a clean tea towel. This surface is ideal for kneading. If your bench top is not suitable, use a large bread board with a slightly wet tea towel folded in half under the board. The moistened tea towel will stop the board moving while you're kneading. Sprinkle a small amount of the same flour you used in the recipe onto your bench top and place the dough on it. Before you start kneading, poke your finger into the dough and see how the indent stays in there. This is a good way to test your dough as you go through the kneading process.


The dough stays right in front of you all the time, but you push a portion of it away with every action. After you've pushed out, fold that portion of the dough back on itself like the top of an envelope. Turn the dough a quarter turn and push it out again with the heal of your hand. Fold it back on itself. Another quarter turn. When you've kneaded for one minute, your dough will look like this:


Don't rush things though just for the sake of a few minutes because the work you do here makes or breaks your bread. Fold all the bread into itself so the other side forms a nice smooth ball like this:

First rise
Place the ball of dough, smooth side up, in a clean bowl that's been very lightly greased with olive oil. Cover the dough with a clean moist tea towel or a lightly greased piece of plastic wrap. The bread must be covered well so it doesn't start to harden while it's rising. If you've got a cold kitchen the greased plastic wrap might be the better option. You want the dough to rise in a warm draft-free area. If the dough stays cold, it will take hours to rise. So place in in an oven that you've heated to about 150C for a few minutes and turned off. Or you could put it outside in the sun (I do this). Make sure it's covered properly though, you don't want flies or ants in your mix. Or place a heated wheat bag near the bowl. If you have a pot of soup on the stove that is still warm, place the bowl near the stove. If you have a hot water system that is warm during the day, that might be a good place for you. You're looking for a a temperature of around 20 - 24 C. If the area is too hot or too cold it will effect the taste and texture of the finished loaf. Leave the covered dough in the warm spot untouched for about 30 minutes and check. It needs to double in size, like this:

STEP 5
Punching down and forming the dough
Punch the dough to deflate it. It will look like this:


STEP 6
Second rise
Let the loaf sit in the loaf tin for the second rise until it's lifted a couple of inches but not bulging over the sides.

Baking
You need a hot oven to get a good lift, so when the oven is hot, place the loaf in to cook. After 10 minutes, turn the oven down to 200C and cook for another 15 - 20 minutes, or until you can smell baked bread and the bread is golden brown. Put the bread on a cake rack and get the butter ready because you are about to enjoy your bread.

Rhonda, thank you so very much for this article! I've made bread in the past and always wondered if I was doing it right as, for example, I didn't really know what exactly the dough should look like after it's kneaded. Now I do! Woo hoo. Thanks again.
ReplyDeleteI'm happy to help, susan.
ReplyDeleteWhat a great post. I LOVE to bake bread. The feel of the dough as you kneed, the smell of it baking in the oven and let's not forget the taste. Ahhhhh, I am definately inspired to bake a little bread tomorrow :0)
ReplyDeleteThanks for the tutorial with WONDERFUL pics. I will definately be coming back to this post again and again as I'm learning how to make bread by hand. I haven't done much lately, because it's been far too hot to want to bake. Thanks again!
ReplyDeleteMy housemates and I have been wondering about the best way to go about making bread without a machine for the last few weeks. This is a very timely post. The instructions look great, I will be giving it a go this weekend!
ReplyDeleteI hope your loaves turn out well.
ReplyDeletePlease come back and tell me how it turns out. Happy baking!
That loaf looks so good. I love when they have a bunch of seeds sprinkled on top. We'll have to try that recipe for sure.
ReplyDeleteP~
Hi Rhonda, I thought I better tell you that I use your bread recipe all the time now! I took a loaf to work today (I cooked it on a pizza stone) Everyone loved it and asked for the recipe! sorry I havent checked out your blog before now but I'll be keeping an eye on it, Oh and I still love those shots of your hands kneading the dough! Thanks
ReplyDeleteI saw your mention of your bread recipe as part of your ebook this week, so went back looking for it and found this post. I ended up following it today. Thank you.
ReplyDeleteI've recently started making my own bread as a way of saving money and ensuring that I know exactly what's going into my family's mouths, but have had problems with the rise and lift of my loaves. This tutorial is superb, and I will be printing it out and pinning it to the cupboard over my countertop to use a point-of-reference from now on! Thankyou!!
ReplyDeleteI can't find Gluten Flour anywhere, it's always gluten free flour. I think i'm good at kneading. I can knead heavy handed for the 8 minutes no problems, so can i leave out the gluten flour? If so should i add more of the other flour?
ReplyDeleteRhonda, I'm a newcomer to your blog, having linked here from Wits End (The Crone) and Diary of a wannabe hippe (Shel). It's fabulous, and I spent ages yesterday going back and reading through.
ReplyDeleteAnyway..I baked my first loaf of bread by hand on Sunday. I went online and found every hand made loaf instruction I could. I ended up reading 40ish (by the way, between them all, so contradictory, I got so confused). I have just deleted every one of them, and will just stay with this one.
It's fabulous, as is everything I"ve read in this blog.
Thank you so much. You're going to be a great help to my family.
I love your blog and your tutorials!! I do have a couple of questions I hope you can answer for me. Your bread recipe is the only bread we now eat, yay, but we eat a lot and I'm having to make it 4 or 5 times a week. Is there any way I can double the recipe or make two annd freeze one loaf?
ReplyDeleteAlso how would I make it WW bread and Rye bread etc do I just change the flour?
Thanks in advance.
Rhonda,
ReplyDeleteThank you for inspiring me again. Look I made bread for the first time!!
http://i29.photobucket.com/albums/c288/angelaswindle/6-15-08022-1-1.jpg
Need help with my bread baking... is there any way I could have a loaf of bread that stays "fresh" after the 1st day WITHOUT using bread improver? Many thanks in advance.
ReplyDeleteHello Anon, you you can double the recipe and freeze. To change the type of bread, just change the bread flour. When you use the heavier flours, you will probably have to increase the amount of water as well.
ReplyDeleteGreat work, Agie!! well done, love. :- )
Anon. I bake bread the day I want to use it. Could you make the dough and freeze it?
I just tried this for the first time today and it turned out just right! I'm trying to cut back dramatically on our expense with store-bought bread and I think this is definitely going to work.
ReplyDelete8 to 10 minutes of kneading sure took longer than I thought it would, but I was able to tell when it was done without looking at the time. Color me a proud baker. ;)
My whole family loved the bread and I can't wait to make it again.
Thanks again!
Hello Rhonda - Found your blog while looking for tips on bread making. This post is awsome, and will look forward to read all your posts!
ReplyDeleteI baked for the first time yesterday ...here are the results
http://chitra-ammas-recipes.blogspot.com/
Just wanted to say a huge thanks for the bread tutorial - I cheated a little and used the breadmixer to make the dough and followed your steps from Rise 2 and am pleased to say it worked well!!! I intend to blog pics later today :)
ReplyDeleteThanks again
I just wanted to let you know that I had been looking for a good deal on a bread machine since I read through your blog a number of weeks ago and printing off the bread recipes. I found one on Craigslist here in TN and the man delivered it to my office door! I will be trying out some of your recipes and will let you know how I do. Thank you so much for your wonderful blog! I enjoy reading it every day.
ReplyDeleteWhat am I doing wrong when I am kneading the bread dough and it won't stick together and just folds over instead of meshing together? Too much flour??
ReplyDeleteThank you for the tutorial! I just made bread for the first time ever and it's pretty yummy. Very dense and moist. But the top is pretty toasty...just about burnt. I noticed after the first ten minutes on high heat it was very brown. When you say "Turn your oven on to its highest setting," do you really mean that? Mine's is 550F or 288C. Is that too hot? Or is there something else I did wrong? Thanks again for your help.
ReplyDelete--Sarah
Anon, you need more water. Sarah, yes, that's too hot. Set it around the 500 mark and see how that goes, then turn down to 475 for the main cooking.
ReplyDeleteWooohooo! Rhonda you rock! I am amazed that I could make bread and have it turn out like this. :-) :-) Thank you thank you!
ReplyDeleteI followed your instructions and started it out at 500*F, and turned it down to 390* after about 7 or 8 minutes because I know my oven is sometimes slow to adjust the temp. I also brushed the top with melted butter. I must not have kneaded it long enough last time because then it was really crumbly and now it is very soft and fluffy and just the crust is crunchy. The other thing I changed was putting it out in my car to proof instead of leaving it on the counter, since it is a cool day here (only about 24 C).
This is great. I'm going to get some other types of flours and start experimenting. I never want to buy bread again! I don't really have any "real-life" mentor ladies to show me about all these skills that we are (sadly) losing as a society, so I am super-excited to have found your site. Thank you again!
--Sarah
Hi Rhonda,
ReplyDeleteJust wondering if you could give tips on baking gluten free bread, as my wife can't eat wheat. Cheers, Akos
Akos, I can't help you, sorry. I've never made gluten-free bread.
ReplyDeletegreat tutorial! I am going to give it a try. Hope my bread turns out like yours!
ReplyDeletehi rhonda, thanks for the tutorial, it has helped my bread making hugely. i do have one problem though. my bread just won't rise properly. it matches your photos up until the punching down step - i don't get bubbles of air and i don't get that lovely whoosh i remember hearing when i've seen bakers do it. the second time it hardly rises at all.
ReplyDeletei leave it to rise in the sun room - we live on a mountain in tassie, so it only gets to about 20 degrees in there.
any suggestions?
Hi Rhonda,
ReplyDeleteFirst I would just like to thank-you for your wonderful blog, I enjoy it so much and it is really inspiring and motivating too.
I would like a recipe for a wholewheat/wholemeal loaf, do you have o good one?
Thanks again.
Kindest regards to you and Hanno.
Thank you so much for this post! I've tried, and failed at making bread from scratch for about 10 years now. A perfect loaf the first time!! THANKS!!!!
ReplyDeleteHi Rhonda, I was wondering if you have seen this, Mary Hunt says it revolutionises bread making.
ReplyDeletehttp://www.moneyrulesdebtstinks.com/?p=460
and this link to a basic recipe
http://www.artisanbreadinfive.com/?p=195
Many thanks for your blog
Princess
My father is a huge fan of gluten free bread and I always try to bake one for him whenever we see my parents. He has yet to be fully blown away by any of the recipes i've tried. Simplicity is key, and yours looks perfect! Can't wait to try it.thank you for shearing your post.
ReplyDeleteArtisan bread in 5 looks like an interesting book. I think the main idea is that they found that you can refrigerate your dough after the 2nd rise for up to 2 weeks. You just cut off what you need immediately when you need it out of the fridge. That might be useful for anyone knowing how to bake in batches! I'd love to hear if anyone has tried this!
ReplyDeleteYour blog is great Rhonda-the photo guide for how your dough should look at each step is exactly what I needed.
Thanks
:) Sarah EKD
Hi Rhonda,
ReplyDeleteI plan on making this bread next week, the boys and I are on a baking mission this week with a full schedule! I make a loaf every few days that we all enjoy for breakfast filled with lots of seeds and honey. It's delicious and keeps me full all morning. I make it the night before, and on the second rise, pop it in the fridge where it proves slowly overnight, ready to be baked fresh in the morning! This means that when we all walk out the door at 7.30am, we've had beautiful fresh bread (the next 2 mornings it's grilled as toast). I'll try your recipe and see if I can do the same with it. Looking forward to it.
Thanks for an interesting blog.
Kristy
I've been wanting to know how to make bread from scratch..But I don't know my mls could you help me on the water part please..
ReplyDeleteThanks.. Sister Brenda
There was only one time when I baked a loaf of bread. It turned out too dry. Perhaps, I put too much flour, or kept it in the oven for too long.
ReplyDeleteYour recipe seems to be the most thorough I have read so far on the internet. Unfortunately, bread is not my friend for now hehe . I will certainly make a loaf with this recipe for my folks. Thank you.
Hi Rhonda
ReplyDeleteI found your bread making tutorial on a NZ website and have traced it back to you. I want to say thanks so much for brilliant instructions, and great photos - I felt like you had written the tutorial just for me! I have tried making bread four or five times before, and had failed every time. Now I know exactly why, and I can't wait to try again.
from Stephanie
Dear Rhonda,
ReplyDeleteIs it possible to make bread with ZERO salt?
TQ.
Hi Rhonda,
ReplyDeleteSara seemed to have the same issue I did but I didn't see your reply. I baked my bread at my oven's highest temp, 550 F (288 C) for the first 10 min and it's burned all over! Are US ovens different? What is the "high" temp you bake yours at for the first 10 min? I'm bummed it didn't work this time but I'll definitely try it again! thanks
Thank you so much for this. Your instructions are very easy to follow and comprehensive. My bread was delicious and my husband has asked me to make more, he likes it that much! Thanks again :)
ReplyDeleteThanks so much for this recipe with the pictures! Great to help me made bread. Thanks again! Margriet.
ReplyDeleteI have tried to make bread several times but mine never rises much. Where can I buy 100% stoneground flour. I have looked around but the ones I buy never seem to have enough gluten. I live in Sydney
ReplyDeleteJohn
John, you're probably not kneading as long as you should. Eight to ten minutes of vigorous kneading will give you a well risen loaf. The recipe here calls for gluten flour, if you're not kneading enough, the extra gluten in the flour will give you the rise. That's why I included it in this beginner's loaf - most beginners don't knead enough. Add the gluten and see if it makes a difference. You can usually buy it from the health food store or Woolworths.
ReplyDeleteHi Rhonda
ReplyDeleteCan this be kneaded with a good stand mixer? I'm sure doing it by hand is good for the soul and the bread - but with 3 small children I just don't see it happening for me!!
Hi Rhonda,
ReplyDeleteThank you so much for this wonderful tutorial. I am another that has struggled for years to make a decent loaf of bread at home. And finally with your fantastic tutorial I have succeeded. I can't put into words the satisfaction that brought me.
I did have a quick question though. I've made bread many times now using your recipe. I had one loaf recently though that didn't rise as it should have.
On it's 2nd rise, instead of rising into a lovely 'dome' shape in the tin, is started oozing over the sides as soon as it came to the top of the tin. So consequently it was 'flat' on the top.
It's only happened the once though, but I would love to know where I went wrong. Too much water?
Best wishes and thanks again,
Megan
Very Helpful! Thank you.
ReplyDeleteUhmmm, don't use Boiling water for the yeast--it kills it, it won't activate no matter how much sugar you use! (experience is the Best teacher, sigh).
Hi Rhonda,
ReplyDeleteMy Daughter and I are Gluten Intolerant so was wondering what sort of flour I could use to make bread? I dont want to buy a pre-mixed packet because I need to learn how to do this from scratch at some point (may as well be now!) as Gluten free Bread is really expensive and often not very nice! So making my own seems to be the best option :o) Any advice would be really appreciated.
Thank you
Hi, thanks for the tips. That was a great help to me...
ReplyDeleteOK so I have been trying to make bread for a while. My problem is that I make bread using 100% whole wheat flour (locally grown and milled). It remains to sticky to knead properly or its to dry, I can't seem to find a happy medium. Is it my whole wheat flour? I am going to try the tsp thing, because I add all the water to the yeast and honey to prove it, and then I add my flour slowly.
ReplyDeleteHi. I've tried and tried to make a decent loaf. It's always heavy and dense. from reading your tutorial it must be in the kneading. Also this is the first time that I've heard mention "gluten flour"
ReplyDeleteI'm living in the Philippines and suspect they have a different name for it....if they have it. does gluten flour go by any other names.
Thanks. I'll let you know about the next loaf. mstng03@gmail.com
John Lane Feb16,2011
Hi Rhonda
ReplyDeleteI hop its not too late to get some further advice on this topic.
My bread making has developed a rather sad pattern of late. I follow you tutorial to the letter, but then when I put it in the oven to cook (say within the first 10 mins) it has a kind of mini flop. It drops about 2cm and goes from a lovely dome shaped top to flat with a slight sag in the middle. The bread is still ok to eat, but isn't as light and fluffy inside as other I had managed earlier.
I've tried longer and shorter kneading times, more and less salt and/or sugar, and I've tried letting it rise in the sun or in a slightly preheated oven.
I've seen mention of "over proofing" on some forums, but have tried any suggestions and they don't seam to be helping.
I was wondering, have you ever encountered anything like this? Do you have any suggestions?
Hi Ian. It sounds like you're being a bit rough with the dough - after it's risen the second time in the tin and while you're putting it in the oven. If you drop the tin hard on the bench or on the oven shelf at this point, it will deflate a bit. It's like punching the air out again. If it's not that, it might be your oven temperature - test it. It should be 220 - 200C.
ReplyDeleteGood luck.
Awsome post! Awsome blog! I just chanced upon your blog and I am so happy I did! I have been wanting to try making my own bread but have been intimidated by the whole procees. Your blog has inspired me to go ahead and have a go at it. I will try baking some this weekend with one of my daughters to help with the kneading. I'm really glad I found you and your blog!! Thanks again!
ReplyDeleteHey Rhonda (again :P)
ReplyDeleteI was wondering if you could describe in any greater detail how you time putting your bread in the oven. My bread is coming out ok, but I'm after that illusive "oven-spring". Often I think I put mine in too late or early. I appreciate its hard to describe because temperatures vary and so on, but I'm hoping there are some little signs you look for, when the dough is telling you its time to go in the oven. Love your work as always :) Cheers.
Just made this! (I've made it before) It's my favorite!!
ReplyDeleteThanks!
Kristin
My loaves are baking as write this! I made one in a pan and one round freeform. They are covered in seame seeds, oats and soaked linseeds!
ReplyDeleteI have never made bread by myself before, only ever watched my mum when I was a kid but everything has worked so far! I'm just trusting my instincts :)
Thank you so much for this tutorial!
Thanks so much for this step by step guide, I'm going to have to try this tomorrow.
ReplyDeleteThanks again for the tutorial, I did make the bread and it turned out pretty good for my first attempt. Here is a link to my blog post I have mentioned this tutorial as well as your blog in general. http://www.mywallabygold.blogspot.com. I really enjoy reading your blog and you inspire me to live a simpler more rewarding life. Thanks Rhonda!
ReplyDeleteHi Rhonda,
ReplyDeleteI am new to your blog and was inspired to try your beginners bread recipe since I had never made bread before and I am trying to find a less expensive way to have bread at home. I was wondering, however, when I did the kneading process and got to about 8.5 minutes of kneading, the dough which had started to look very smooth, began to tear. Did I over mix/knead? I I have tried making bread before and they are always complete failures. I can never seem to get the dough smooth like yours looks in the picture for the first rise. I don't know why. Could you give me some possibilities? Thanks!
I tried to make bread for the first time last weekend, lets just say, I threw it out immediately I got it out of the oven, it was terrible.
ReplyDeleteAfter reading your recipe I can see where I went wrong, and I will try it again your way.
Thanks for sharing.
Hi Rhonda
ReplyDeleteI've just been working my way through your blog, and really like this easy introduction to bread making. Whenever I've made bread in the past it has always been heavy, so it looks like I didn't knead it enough. I live in Greece, and have no idea what Gluten flour might be called, however, so think I'll just have to do it the hard way with more kneading!
Can you please tell me if it is necessary to use the milk powder? Could I use something else instead? We can't drink milk in our home......
ReplyDeleteThanks,Cynthia
The milk powder is optional. It just adds flavour.
ReplyDeleteHi Rhonda.
ReplyDeleteCan you recommend a good breadmaker for a small family of one person and one cat? Doesn't need beep for add fruit, but pasta kneading would be kneato (hehe). Congratulations on your book success! Thankyou.
Hi Rhonda -
ReplyDeleteI just found your other recipe for making bread in the bread-maker...
I have never used my bread-maker before, someone gave it to me because they didn't use it and it came with no instructions. I did everything as you said, but I had a silly question...
Am I supposed to mix all the ingredients together in a bowl or something before putting them into the breadmaker, or do I just pop them all in and it will mix it for me?
It's still cooking and I've peeked through the little window but whats in there really doesn't look kneaded or anything like bread :s haha!
Any suggestions?
Thanks for creating this blog Rhonda, it is very helpful for me and all the like minded people. I love bread and is gonna try this recipe very soon. Do you also make Ciabatta? If so, will you please share your recipe?
ReplyDeleteHi there, just came across your site on bread making for beginners. Love the photos for the different stages.
ReplyDeleteI was wondering if you place some ice cubes to steam the oven during the bread baking as I've read that it's supposed to help with the bread raising...although I did not notice the bread raising any further in the oven when I did it.
My bread always turned out dense and not light and fluffy as I hoped for...I wonder if it's to do with my inexperienced kneading. Will it be ok to knead more than 10mins as long as I get the smooth elastic dough as shown in your photo?
It would be great if you could give me some pointers :)
Many thanks.
Anon, you should keep kneading for as long as you need to to get a smooth and springy dough. That is AT LEAST ten minutes.
ReplyDeleteI've just tried to make bread from a River Cottage episode, and it has failed abysmally. Not enough water, not enough kneading. Not enough RISING. :-( So, having found your recipe, I'm going to have a go at doing it the Aussie way. :-)
ReplyDeleteVERY MANY THANKS!!!
M.R., Pyrmont
Hi
ReplyDeleteThis is the second time i've used your method with fabulous results! Delicious bread from the wonderful easy to use step-by-step instructions. The pictures are brilliant and gave me confidence that i was correct every step of the way. Thanks Rhonda!
Rachel
Hey thanks for this recipe. Made my first loaf ever this afternoon, I made a few mistakes and had to compensate a few times then decided to go for gold and put herbs in, resulted in a great herb loaf. Anyway, Kudos this is a great recipe
ReplyDeleteu are a wounderful woman with blessed hands.
ReplyDeleteTHANK YOU
LERE
Hi Thanks alot,i am going to try this for the first time,i hope it works am actually thinking of doing bread as a business here in Africa Uganda(Have you heard of that small country before,will let you know of the outcome.
ReplyDeleteCheers
Hi,
ReplyDeleteThanks for the guide and photos, they're great. I am still having some trouble though, I was hoping you could help.
I've tried this recipe twice and my dough just won't rise enough so I end up with quite a dense bread. I use 2 tsp of instant yeast because I can't get dried yeast, is this the problem? I've made sure the room temp is perfect AND have tried giving it more time. Every other step works out well. It's very disappointing :(
I have made traditional bread using water, flour, yeast and salt with success, so I don't understand what's wrong! hope you can help.
I'm sorry, I've never used instant yeast so I can't advise you.
DeleteHi, have you checked the expiry date on the instant yeast?
ReplyDelete